xTool CMYK Inkjet Cartridge User Guide
Updated Jul 7,2026
Updated Jul 7,2026
1 Prepare the ink cartridge
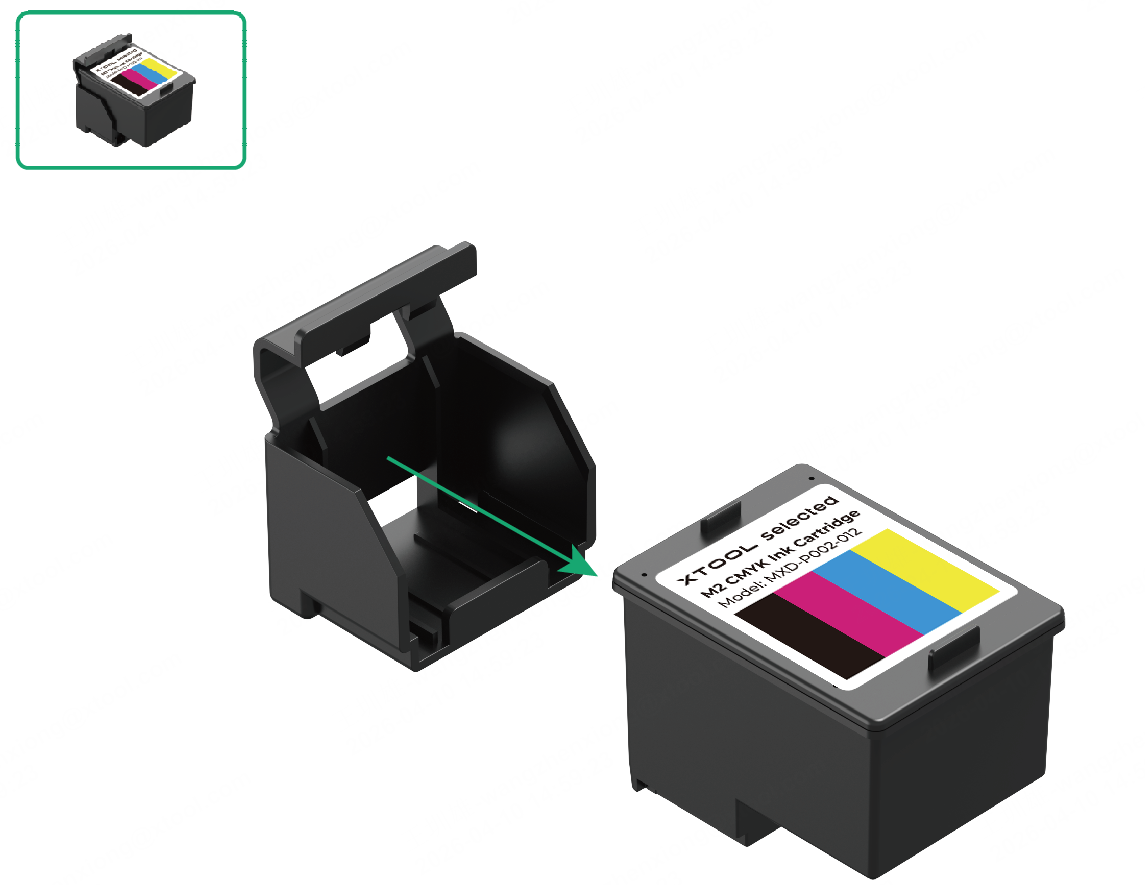
(1) Take out the ink cartridge.
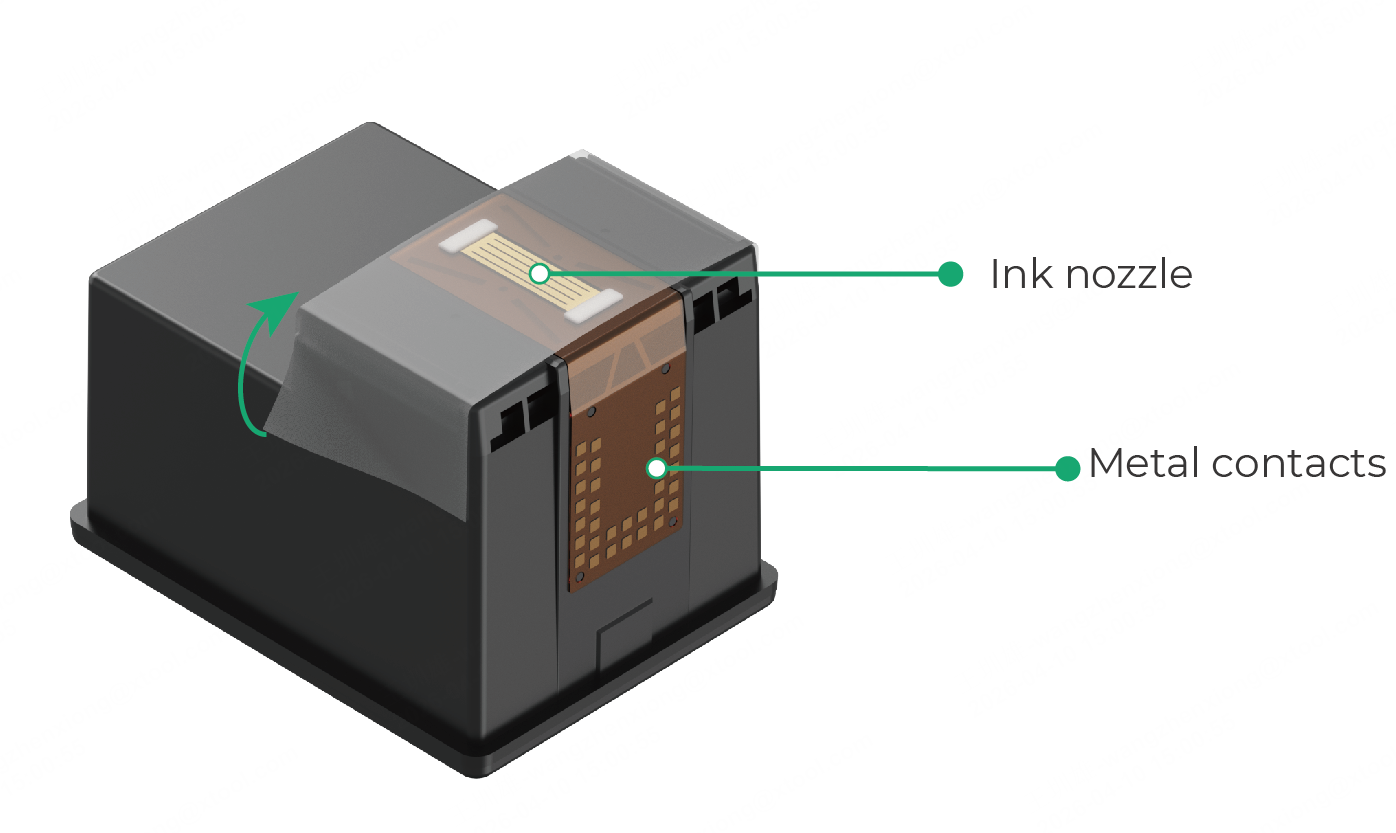
(2) Peel off the protective film.
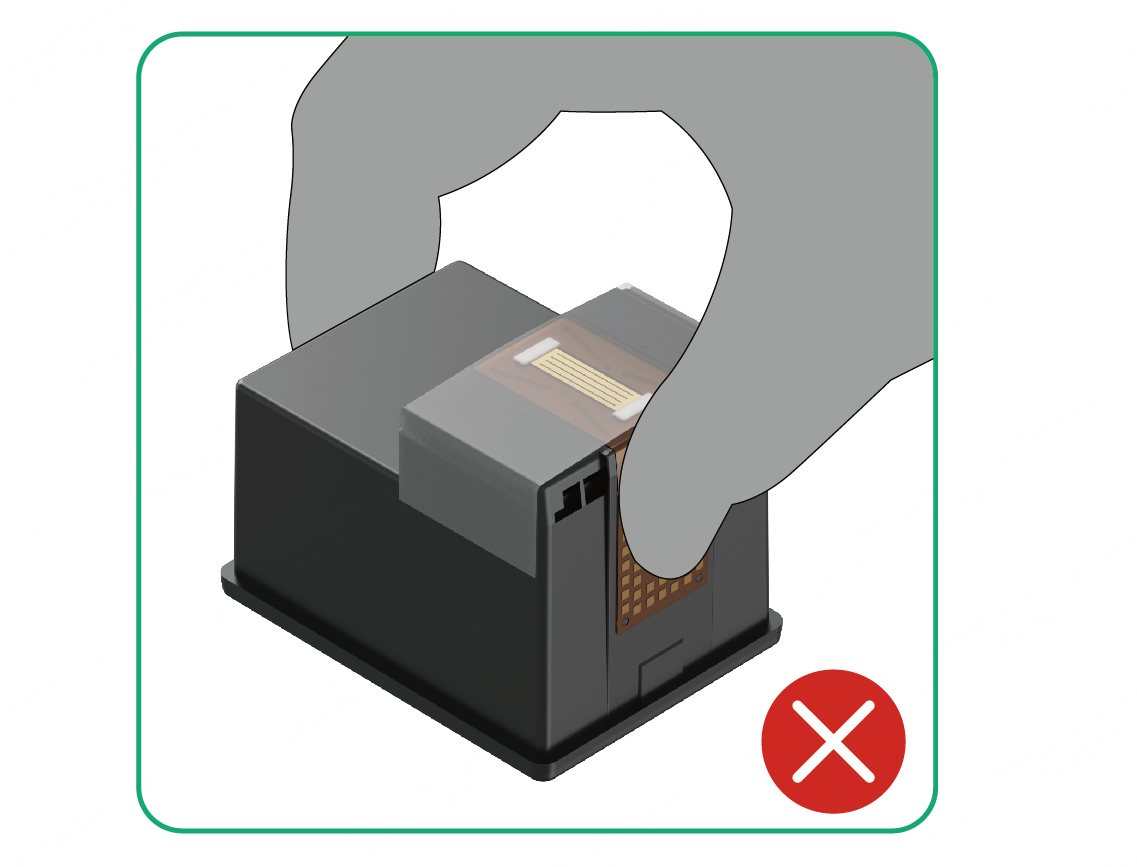
⚠️ Warning
DO NOT touch the metal contacts on the bottom of the ink cartridge.
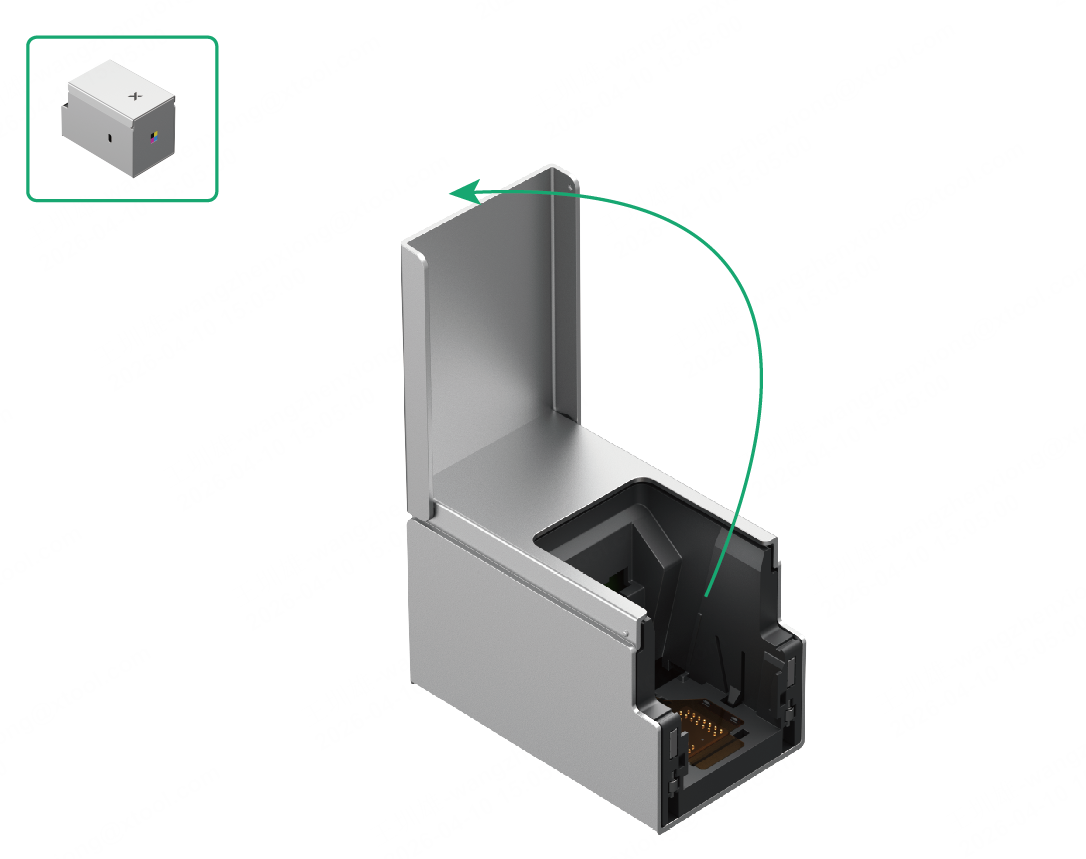
2 Open the front cover
3 Install the ink cartridge
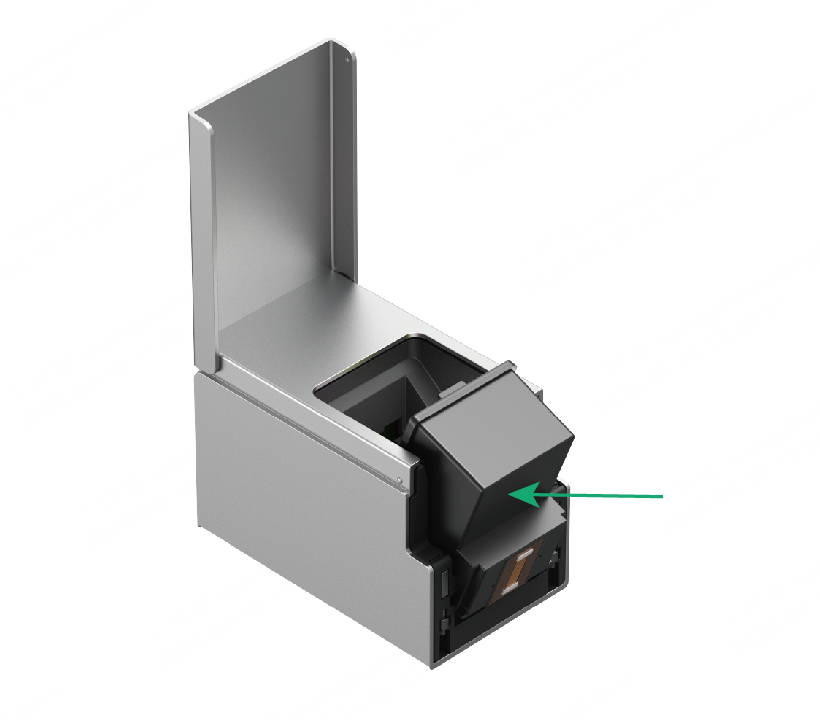
(1) Align the ink cartridge with the inner track of xTool M2 CMYK Inkjet Module. Gently push the cartridge in at approximately a 45° angle.
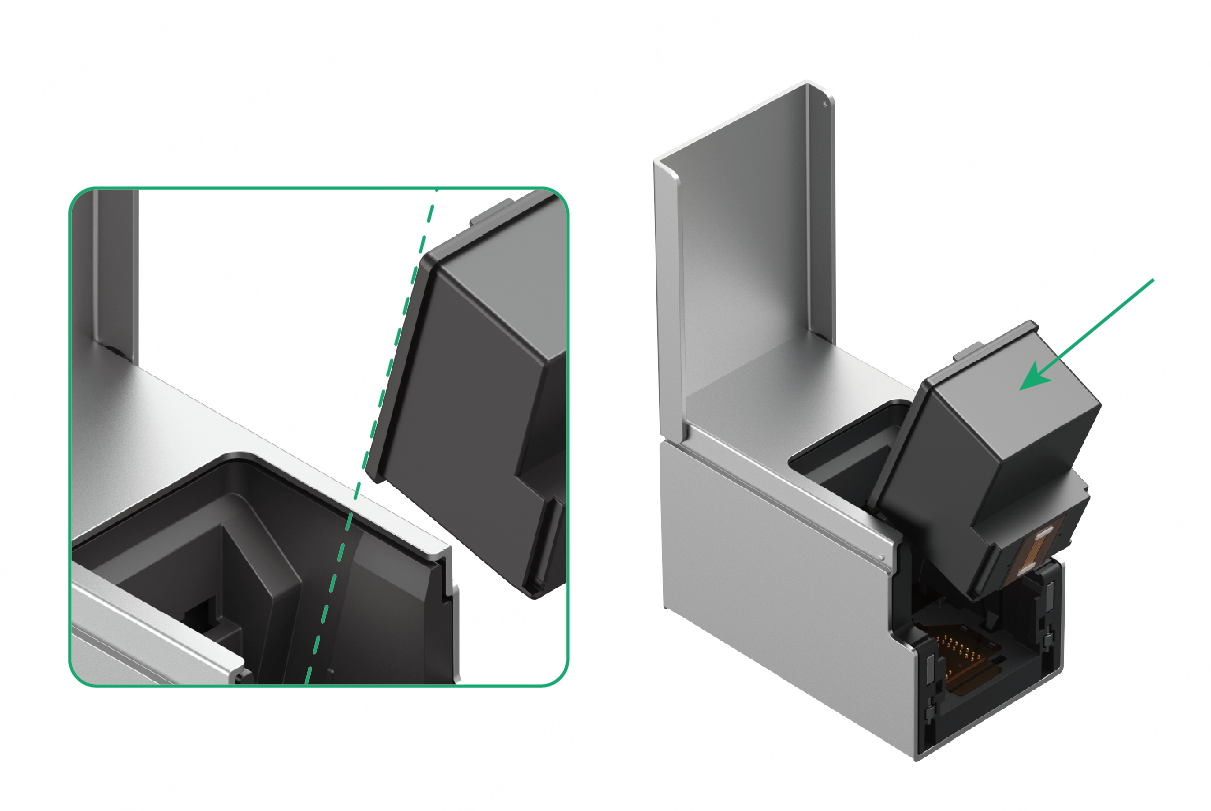
(2) Once the cartridge is fully inserted, press it inward gently. You will hear a "click" sound when the cartridge is properly installed.
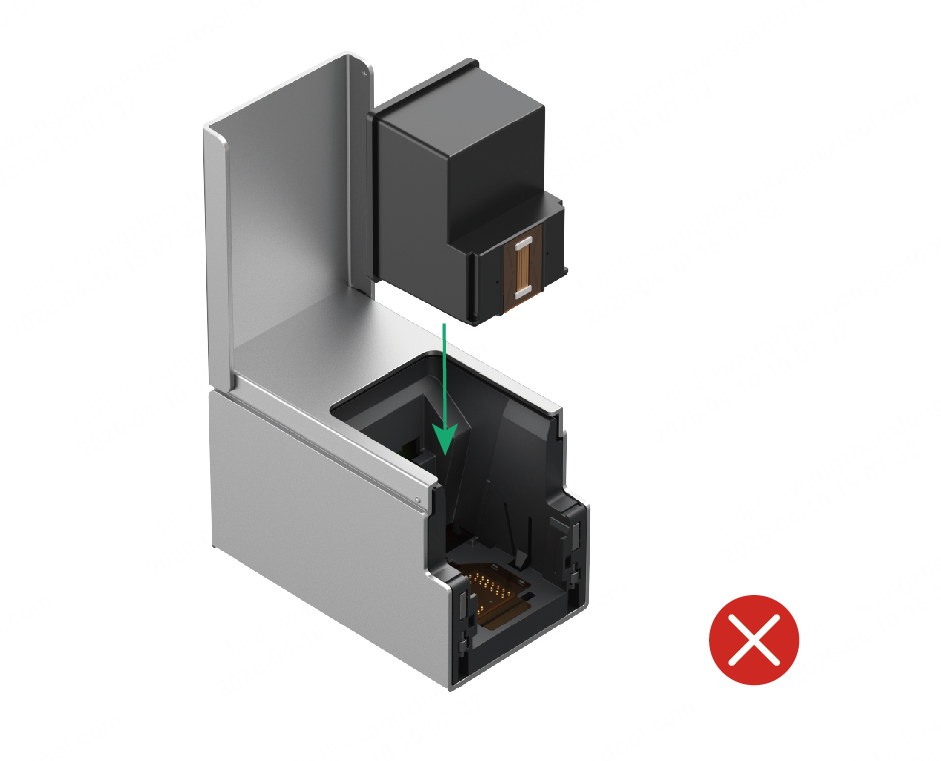
⚠️ Warning
- DO NOT insert the cartridge vertically, as this may cause jamming.
- DO NOT force the installation. If you encounter resistance, adjust the angle and try again.
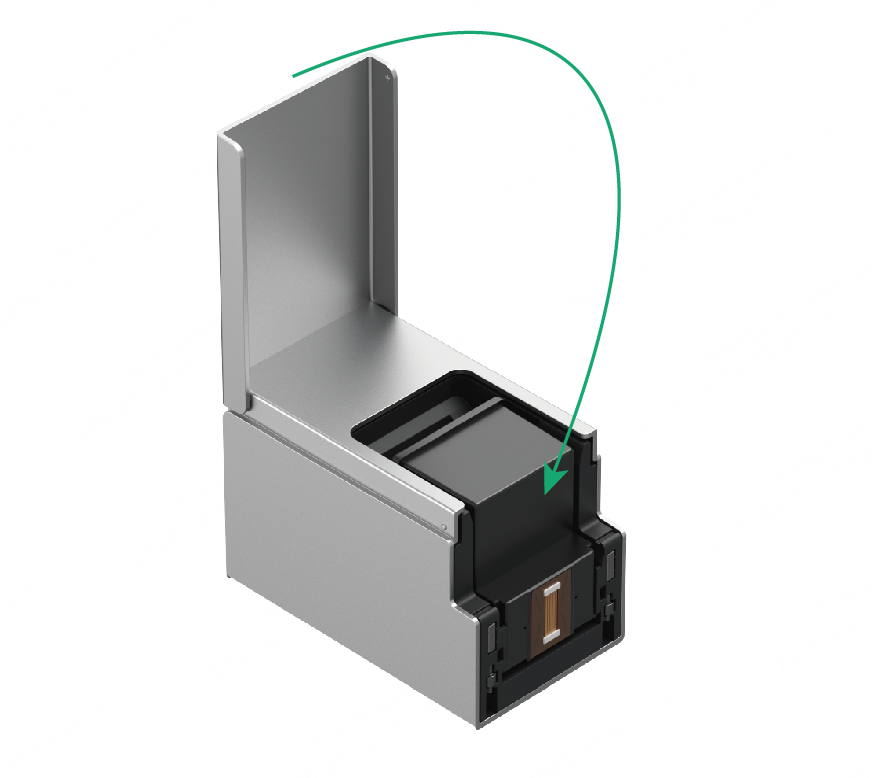
4 Close the front cover
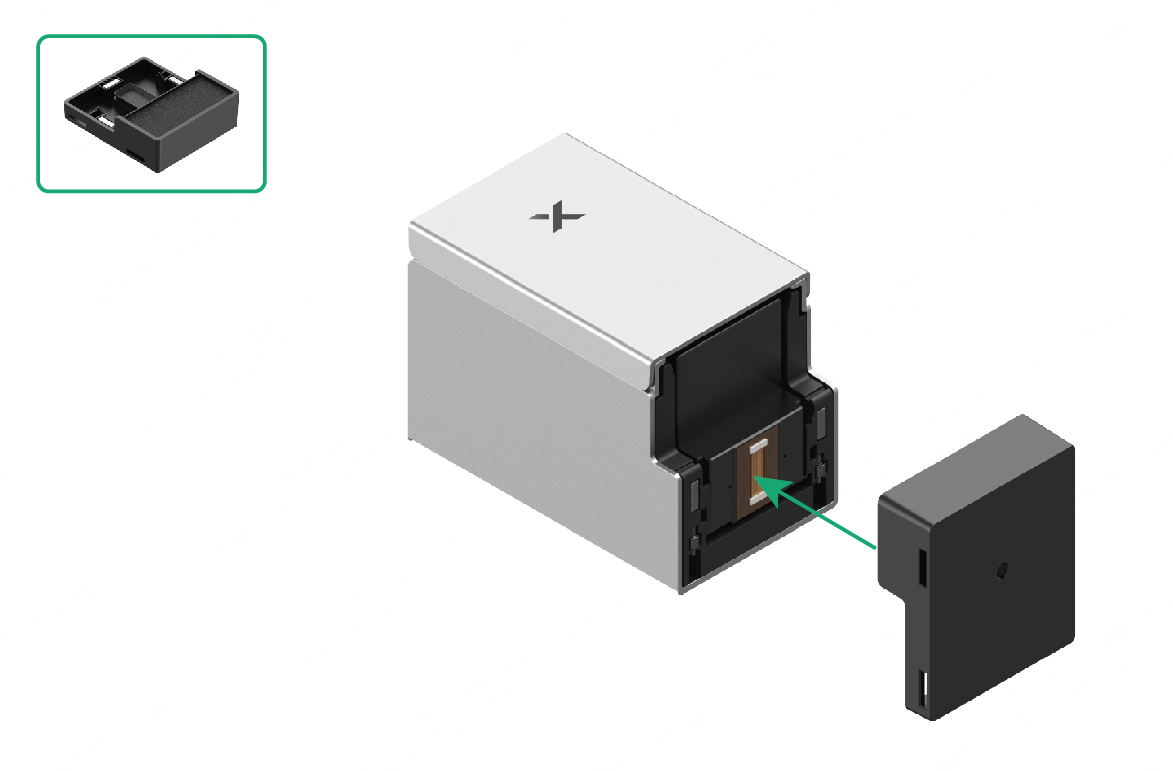
5 Install the bottom cap
Attach the bottom cap to the bottom of xTool M2 CMYK Inkjet Module, ensuring it is magnetically secured in place.
Related links
Preview
Was this page helpful?
36 out of 36 found this helpful
Help Ticket
Use this help ticket to submit your issue. We will respond within 1 business day
Submit a Ticket