Group and ungroup objects
Group two or more objects so they move, resize, and rotate as one. Ungroup when you need to edit individual objects again. Use grouping when you've finished arranging a logo, badge, or any composition you don't want to break apart by accident.
Before you start
- Select two or more objects on the canvas. Grouping a single object is not available.
- To ungroup, your selection must include at least one existing group.
Group objects
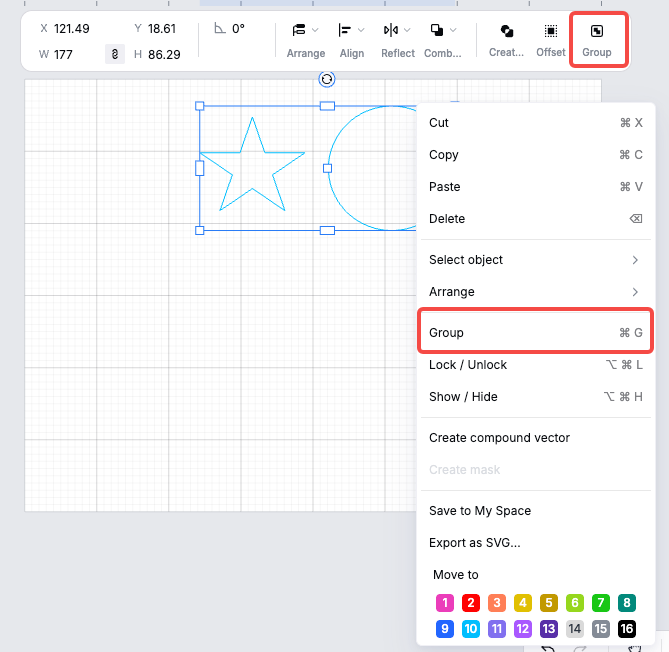
- Open your project in xTool Studio.
- Select the objects you want to group:
- Drag a marquee around them, or
- Hold Shift and click each object in turn.
- Group them using any of the entry points below:
Entry point
How
Keyboard shortcut
Ctrl + G (Windows) / Cmd + G (Mac)
Top toolbar
Click Group in the action bar at the top of the canvas
Right-click on canvas
Right-click the selection → Group
Layers panel
Right-click the selected layers → Group
- The objects are now wrapped in a single group. Click anywhere on the group to select all of them at once; their relative positions are preserved.
Note: A group behaves as one object for moving, resizing, rotating, and processing. To edit a single object inside the group without breaking the group, double-click into the group to enter it.
Ungroup objects
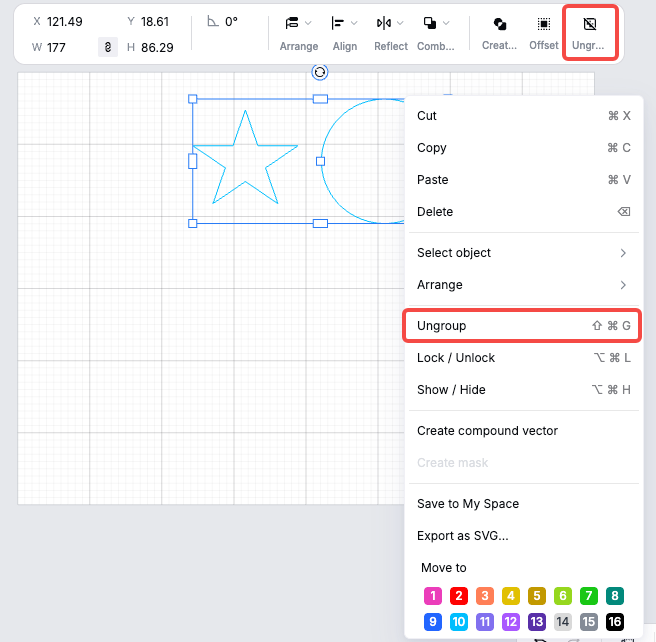
- Click a group on the canvas to select it.
- Ungroup it using any of the entry points below:
Entry point
How
Keyboard shortcut
Shift + Ctrl + G (Windows) / Shift + Cmd + G (Mac)
Top toolbar
Click Ungroup in the action bar
Right-click on canvas
Right-click the group → Ungroup
Layers panel
Right-click the group's layer → Ungroup
- The objects return to being separately selectable. You can now edit each of them individually.
Note: Ungroup only releases the outermost group. If you have nested groups (a group inside another group), repeat the action to release each level.
Nested groups
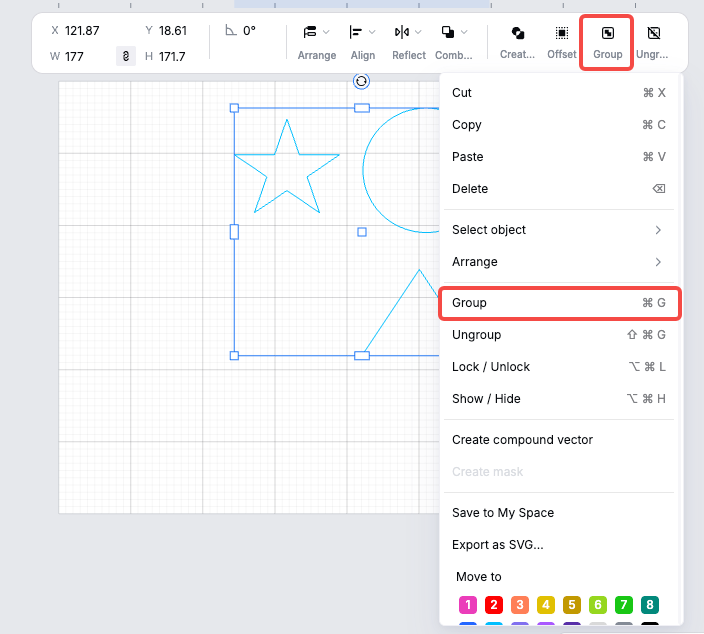
You can group objects that already belong to a group. The new group sits on top of the existing group. This is useful when you're building a composition step by step (e.g., grouping a logo, then grouping that logo with the surrounding text).
To work inside a nested group without ungrouping:
- Double-click the outer group to enter it.
- Double-click again if there's another inner group.
- Click outside the group, or press Esc, to exit.
Tips
- Group anything you're done arranging — for example, a logo + slogan combo. It prevents accidental misalignment when you keep working on the rest of the design.
- The Layers panel on the right always shows the current grouping hierarchy. Use it to verify what's grouped with what, especially in complex projects.
- Grouping does not change the processing properties of objects. Each object inside a group keeps its own material, cut/engrave/score mode, and parameters.
- If the Group button or shortcut doesn't respond, check that you've selected at least two objects.
- If the Ungroup button is grayed out, your current selection doesn't contain a group.
Quick reference
I want to… | Do this… |
|---|---|
Group selected objects | Ctrl + G / Cmd + G |
Ungroup the selected group | Shift + Ctrl + G / Shift + Cmd + G |
Edit one object inside a group | Double-click into the group |
Exit a group I've entered | Click outside the group, or press Esc |
See the grouping structure | Open the Layers panel on the right |